
wordcloud 사용법 - 단어 빈도수 시각화
파이썬의 wordcloud 패키지와 텍스트 파일 그리고 이미지를 사용하여 아래와 같이 단어를 시각화 하는 방법을 알아보자.
이번 포스팅에서는 해리포터와 마법사의 돌 원문을 사용하여 시각화를 진행했다.
1. wordcloud 설치
$ pip install wordcloud
$ pip install numpy
$ pip install ipython
- numpy : 이미지를 numpy 배열로 변환하기 위한 패키지
- wordcloud : 워드클라우드를 그리기 위한 패키지
- ipython : jupyter notebook에서 워드클라우드를 출력하기 위한 패키지
2. 텍스트 파일 준비하기
워드 클라우드를 사용하기 위해 텍스트 파일을 준비한다.
한글을 사용하기 위해서는 설정이 필요하기 때문에 따로 다루려고 한다.
이번 예제에 사용된 해리포터와 마법사의 돌 원문은 아래 링크에서 다운로드 받을 수 있다.
3. 이미지 파일 준비하기
워드 클라우드를 그리기 위한 이미지 파일을 준비한다.
단, 이미지는 흑백에 배경은 흰색으로 되어있는 실루엣 이미지가 좋다.(이미지 마스크를 사용하지 않을경우 생략)

4. wordcloud 기본 사용법
import numpy as np
from wordcloud import WordCloud, STOPWORDS
from Ipython.display import Image, display
from PIL import Image

# 텍스트 불러오기
with open("harrypotter.txt", "r", encoding="utf-8") as f:
    text = f.read()

# 워드클라우드 객체 생성 (width와 height를 px단위로 지정)
wc = WordCloud(width=1920, height=1080, background_color="white")
wc.generate(text)
wc.to_file("wordcloud.png")

# 이미지 출력 및 현재 경로에 저장
display(Image(filename="wordcloud.png"))
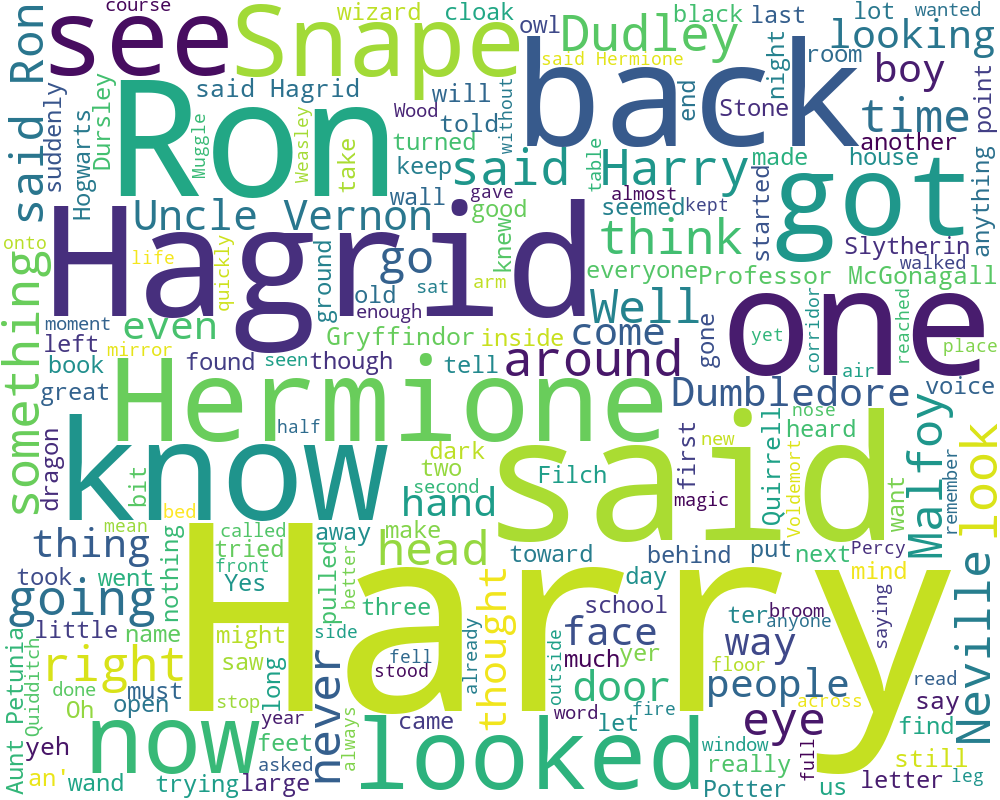
4-1. 결과 확인
아래처럼 기본 설정으로 워드클라우드를 그린 결과를 확인할 수 있다.
5. 이미지 마스크 사용하기
워드클라우드의 이미지 마스크를 사용하면 더욱 다양한 형태의 워드클라우드를 그릴 수 있다.
이번에는 stopword를 사용하여 불용어를 설정하고 이미지 마스크를 이용해 워드클라우드를 그려보자.
위 결과를 확인 해 보면 소설이기 때문에 said와 got이란 단어가 많이 나오는 것을 확인할 수 있는데 이 단을 제외하고 워드클라우드를 그려보려고 한다.
5-1. 불용어 설정하기
# 불용어 설정
ignore = set(STOPWORDS)

# 리스트 안에 불용어를 여러개 추가할 수 있다.
ignore.update(["said", "got"])
5-2. 이미지 마스크 설정하기
# 마스크 이미지 설정
img = Image.open("harry.png")
mask = np.array(img)
5-3. 워드클라우드를 사용해 워드클라우드 그리기
wc = WordCloud(
    width=600, # 워드클라우드의 너비
    height=1200, # 워드클라우드의 높이
    min_font_size=2, # 최소 글자 크기
    max_font_size=100, # 최대 글자 크기
    max_words=1000, # 워드클라우드에 표시할 최대 단어 수
    stopwords=ignore, # 불용어 설정
    mask=mask, # 마스크 이미지 설정
    background_color="white", # 배경색
    color_func=lambda *args, **kwargs: (
        random.randint(0, 70),
        random.randint(0, 70),
        random.randint(0, 70),
    ), # 글자색 (rgb를 0~70의 랜덤값으로 설정)
)

wc.generate(text)
wc.to_file("harry_mask.png")

# 이미지 출력 및 현재 경로에 저장
display(Image(filename="harry_mask.png"))
5-4. 결과 확인
짜잔!
6. 최종 코드
import numpy as np
from wordcloud import WordCloud, STOPWORDS
from Ipython.display import Image, display
from PIL import Image

with open("harrypotter.txt", "r", encoding="utf-8") as f:
    text = f.read()

ignore = set(STOPWORDS)
ignore.update(["said", "got"])

img = Image.open("harry.png")
mask = np.array(img)

wc = WordCloud(
    width=600, height=1200, min_font_size=2, max_font_size=100,
    max_words=1000, stopwords=ignore, mask=mask, background_color="white",
    color_func=lambda *args, **kwargs: (
        random.randint(0, 70),
        random.randint(0, 70),
        random.randint(0, 70),
    ),
)

wc.generate(text)
wc.to_file("harry_mask.png")

display(Image(filename="harry_mask.png"))


Leave a comment